Jenkins is a Continuous Integration (CI) tool that controls repeatable tasks in software development. Check out this guide to see how TestArchitect seamlessly integrates with Jenkins to establish a CI environment for Automated Testing.
With the rising popularity of Continuous Integration/Continuous Delivery (CI/CD), Continuous Testing (CT) is becoming a hot topic for discussion. Knowing that comprehensive tests are running smoothly is highly beneficial for the CI/CD pipeline; but, running tests can be both times- and resource-consuming—not to mention that tests can become boring and rigid! Using the repetitive characteristics of CI/CD and applying them to testing can be a way to address this.
A key component of Continuous Integration (CI) is the frequent running of automated tests to catch potential bugs as soon as they are introduced in the development process. The CI software life cycle involves a process of coding, building, testing, and bug-fixing, often at a rate of several iterations per day.
Most CI systems allow for much of this cyclic process to be automated: Code commits can be set to trigger software builds, build completion can trigger Automated Testing, and test results can be rapidly compiled, processed, and reported to allow bugs to be addressed in the coding process.
TestArchitect supports integration with all CI/CD tools––as long as the tools support command-line interfaces (CLI).
How to Integrate TestArchitect with Jenkins
Jenkins is a Java-based, open-source Continuous Integration (CI) tool that controls and monitors the execution of repeatable tasks in software development. TestArchitect incorporates features that allow it to be readily integrated into a Jenkins-based CI environment.
A typical Jenkins-based CI environment with integrated TestArchitect involves the following components:
- Software development workstations with a common source control server such as SVN or CVS.
- A Jenkins master server to manage the CI process.
- One or more test execution machines. Each machine must be set up as both a TestArchitect controller and Jenkins slave.
- At least one machine with TestArchitect installed to:
- Allow for the development of tests in TestArchitect Client,
- Provide a repository for test-related project items such as test modules and results, and
- Generate execution batch files for the test controllers.
Note that TestArchitect may be installed on a Jenkins slave, but not on the Jenkins master.
Creating a Batch File
To establish a connection between TestArchitect and a Jenkins server, a batch file that includes executed test modules is required.
1. Select a test module or test folder for execution, then click Execute on the toolbar.
2. In the Execute Test dialog box, click the Advanced Settings tab.
3. Select the Export result(s) to xUnit checkbox.
4. Click to specify the path where the XML file is to be saved.
5. In the Open dialog box, specify the path to the Jenkins slave workspace.
- Note:
- The Jenkins master machine is responsible for controlling and monitoring executed jobs on slave machines.
- Jenkins slave machines are responsible for executing jobs.
6. Click Open.
- The specified installation path now appears in the Select a destination folder text box.
7. Click Generate Batch File.
- The Creation of a batch file complete message appears, letting you know that the batch file creation was successful.
Importing the Batch File
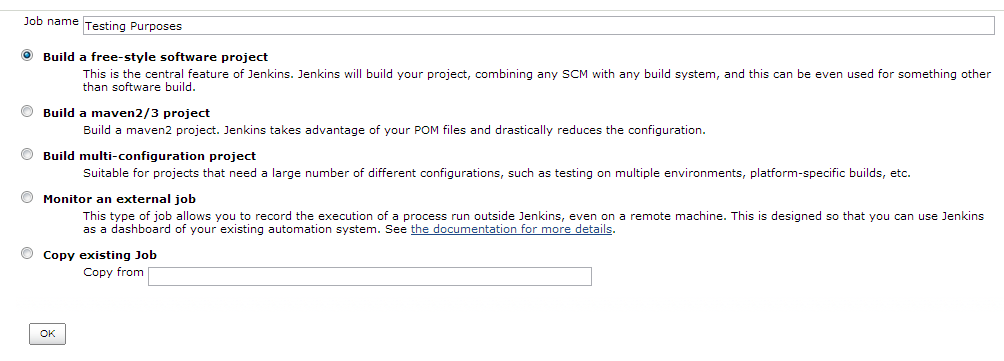
1. On the Jenkins dashboard, select New Job.asd
2. Enter a Job name and select a project category.
3. Click OK.
- The Config page appears.
4. In the Build section, click the Add build step.
5. In the drop-down list, select Execute Windows batch command.
6. Enter the path to the batch file in the Command text box.
- Note: The batch file must be stored on the Jenkins master machine. You must copy the generated batch files on the Jenkins slave machines and paste them into the Jenkins master machine.
7. In the Post-Build Actions section, click Add post-build action.
8. In the drop-down list, select Publish JUnit test result report.
9. Enter *.xml into the Test report XMLs text box to specify that all XML files related to executing test modules are to be selected.
10. Click Save.


