
Cross-Browser Testing is an integral part of the Software Testing world today. When we need to test the functionality of a website or web application, we need to do so on multiple browsers for a multitude of reasons.
The most apparent reason is obviously the fact that end users may be using different operating systems to access the website or web application; at this point of the internet, it would be crass to assume that all users are using Internet Explorer or AOL. Not only could they be using different browsers entirely, but you also must take into account the different versions of browsers: one user could be using Chrome 6.3.5 while another could be using Chrome 1.1.1!

Another measure that Cross-Browser Testing takes into account is the performance of the website or web application on each individual browser as it relates to user experience. Performing a cross-browser load test would verify which browser is more efficient and take that information into account for code writing and edits.
Ultimately, there’s no getting around it: you’re most likely going to need to perform Cross-Browser Testing—so why not automate it? This installment of TestArchitect Corner explores an example user case in which you will learn how to utilize TestArchitect to implement automated Cross-Browser Testing.
User Case
Suppose that you need to test on different web browsers: Internet Explorer, Mozilla Firefox, Google Chrome, Edge, and Safari. You may find yourself asking 2 questions:
- Do I need different interface definitions for Internet Explorer, Firefox, Chrome, Edge, and Safari?
- Do I need to write different tests for each browser?
Solutions
- If the web pages have similar titles, and controls inside the web pages have property values that are the same or similar in different browsers, you can avoid the need to create a different interface definition for each browser:
- For windows (web pages), capture the property doc title, because its value generally remains constant across browsers.
- For controls, capture properties that have the same or similar values across browsers, and which can uniquely identify the controls.
- Controls inside a given web page may have property values that vary from one browser to the next. In some cases, using Xpath locator to identify these web elements accurately and precisely may solve the problem. In others, you may find it too difficult to use a single interface to map all of the controls you need in a way that will apply to all possible browsers. For these situations, TestArchitect supports keyword variations and Systems & Platforms features to help users automate their tests across multiple browsers.
1. Capturing One Interface Definition for All Browsers
1.1. Capture a Window (Web Page)
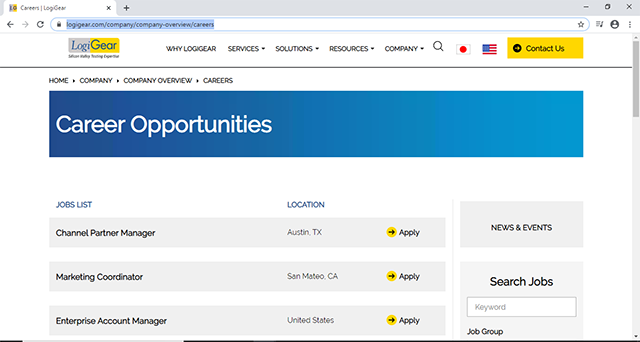
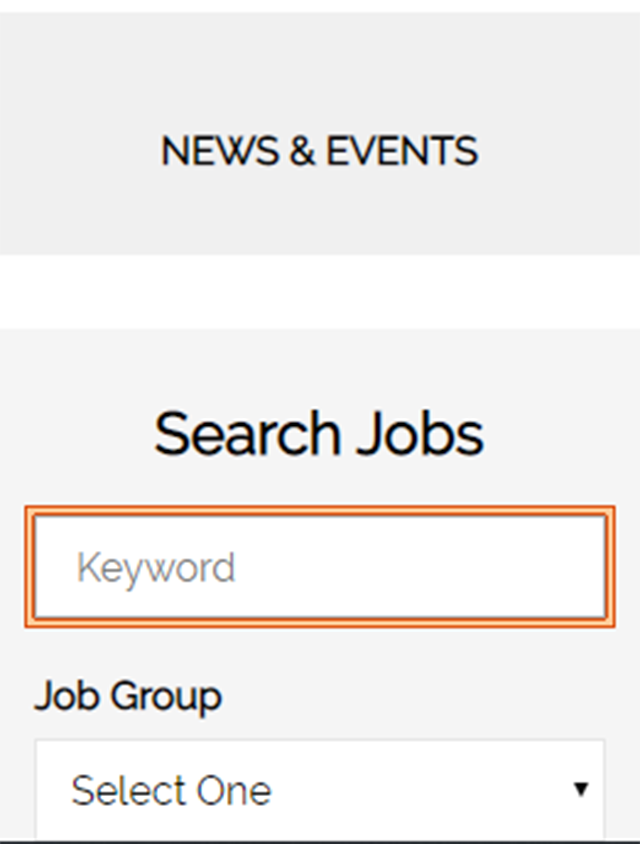
Open a web page that you want to capture the interface of, so that it may be tested on various browsers (e.g., https://www.logigear.com/company/company-overview/careers)
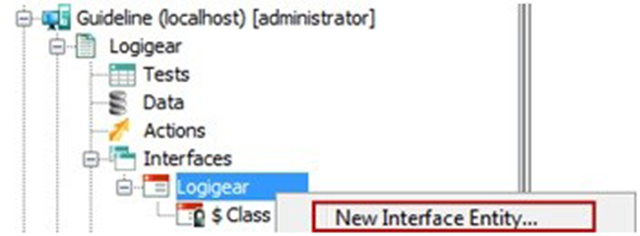
Create a new interface entity in TestArchitect:
- Under the Interfaces subtree, right-click an interface node and then click New Interface Entity.
- Enter relevant information for the interface:
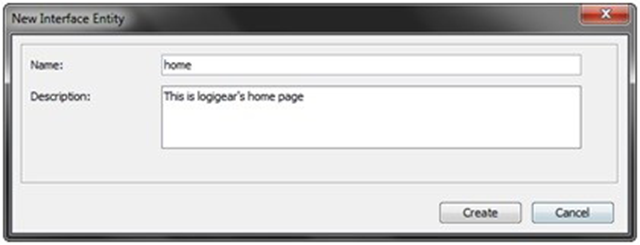
+ Name: The interface name
+ Description: Short description for the interface (this is optional)
+ Click Create. The new interface is added to the project under the selected interface node.
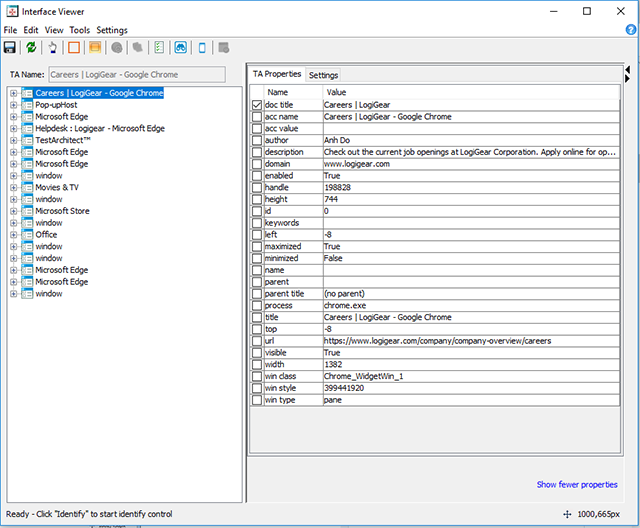
Open the Interface Viewer (Press F7 or select Tools > Interface Viewer from the main menu; or click the Interface Viewer icon on the toolbar.)
Capture the browser window using TA property doc title.
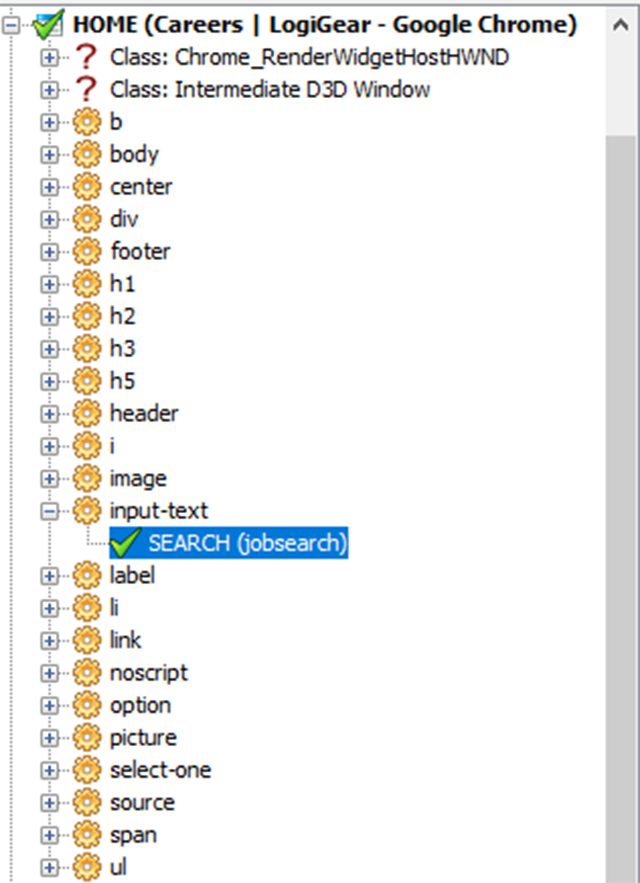
1.2. Capture Controls
Identify the control (there are 2 options):
Option 1
- Expand the tree node
- Select control
- Select Turn on Auto Highlight on the toolbar to identify the control in the browser
Option 2
- Click Identify icon on the toolbar.
- Move the mouse to control that you want to identify on the browser, and then click it.
- Control will be shown on the Interface Viewer’s tree.
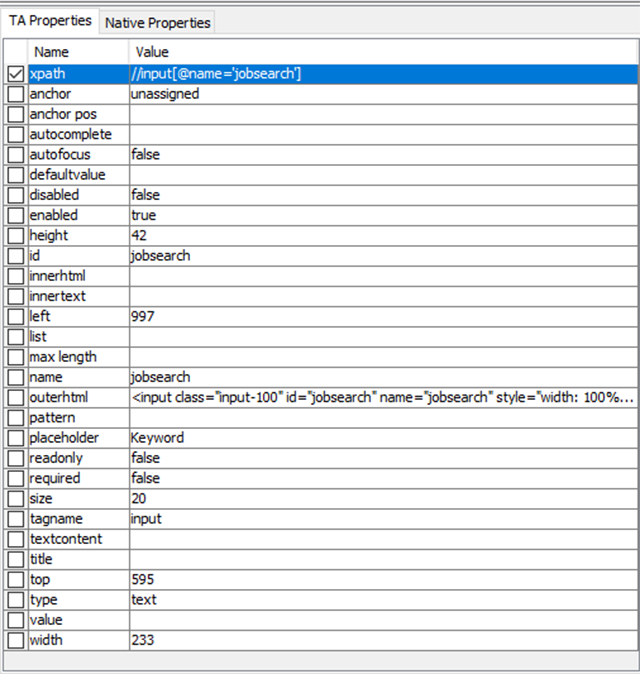
Choose a property to capture with the control. You should choose a property-value pair that (a) uniquely identifies the control, and (b) does not vary in value over time nor across browsers. Typically, the properties Name, ID, or Xpath are useful for identification.
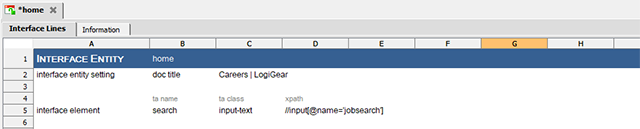
- Map control
- Right-click the control to be mapped, and then select Rename.
- Type your choice of TA name for the item and hit Enter. The control is now mapped.
- Save your settings to the interface entity by clicking Save on the toolbar.
2. Using Keyword Variations
Use keyword variations to create high-level actions or interface entities tailored to a given browser. To demonstrate this, we will perform the following steps:
- Create a high-level action
- Create keyword variations for the action
- Update the keyword variations
- Execute a test with variation
2.1. Create the High-Level Action
Create an action, name it config, and enter a single setting action line as follows:
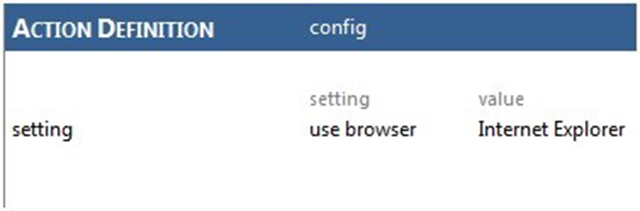
This is your default version of config.
2.2. Create a Keyword Variation of the Action
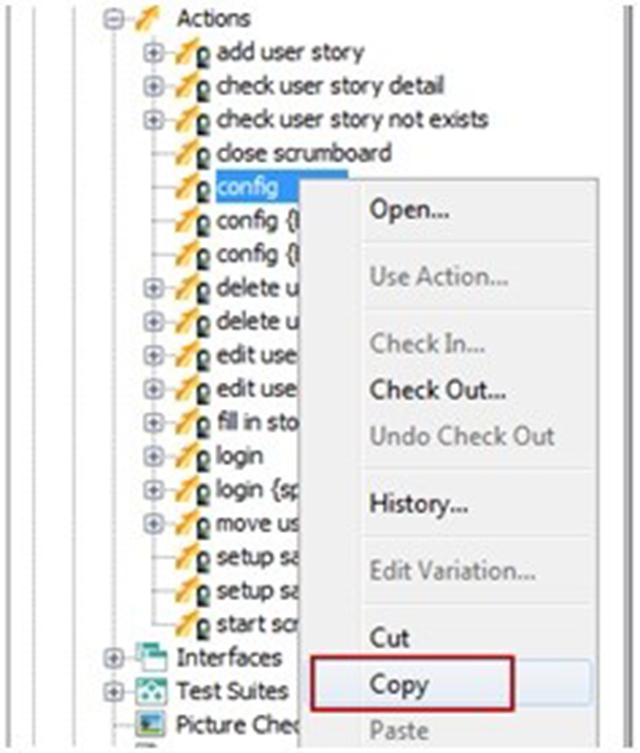
- Copy a definition (of an action, or interface entity) of which you wish to create a variation: In the TestArchitect explorer tree.
- Select the item and press Ctrl+C on your keyboard, or
- Right-click the node and click Copy. (Figure 10)
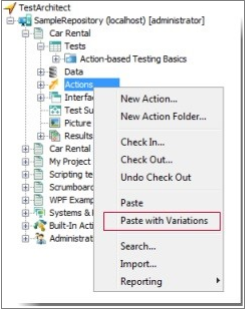
- Right-click a folder node where the variation is to reside and select Paste with Variations from the context menu. (Figure 11)
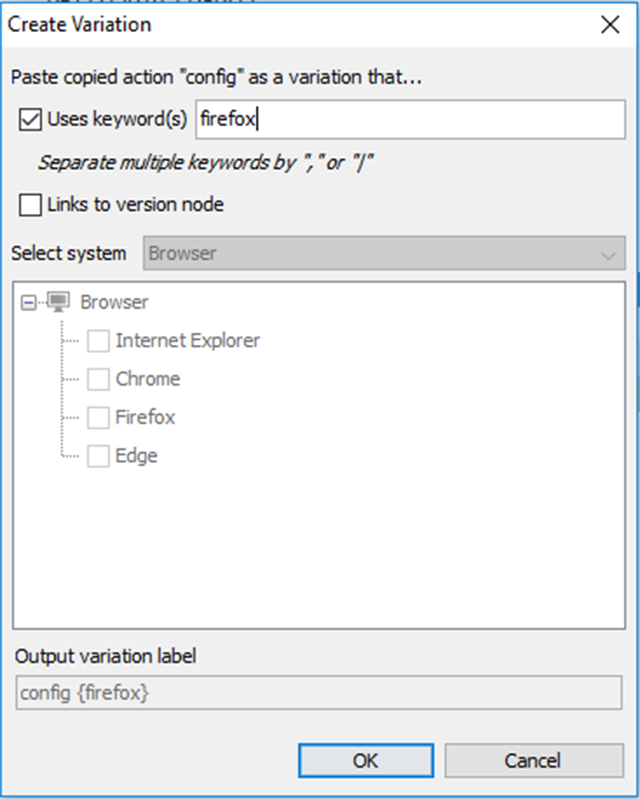
- Select the Use keywords checkbox. In the text field, type the keyword(s) to be used to define this variation. (Figure 12)
- The new variation appears as a node in the TestArchitect Explorer tree. (Figure 13)
2.3. Update the Action Variation
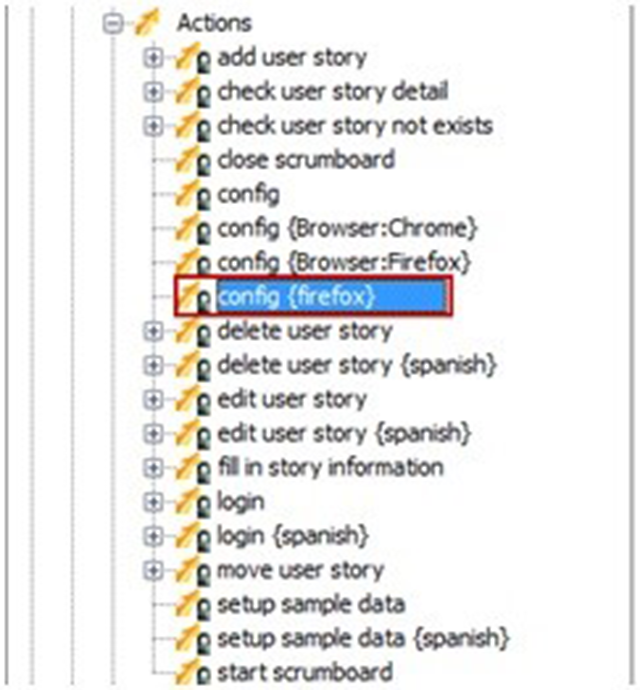
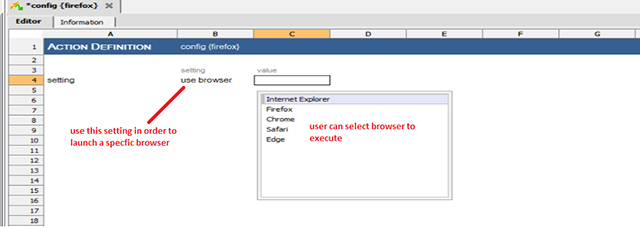
Modify your action to match the requirements of its target browser.
- In this case, the target browser is Firefox. To have TestArchitect launch a Firefox browser window, specify it in the setting/use browser action line. (Figure 14)
2.4. Executing a Test with a Keyword Variation
- Select test modules that you want to execute against the Firefox browser.
- Click the Execute button on the toolbar.
- In the Execute Test dialog box, type the keyword name (“Firefox”) into the Keyword textbox, then
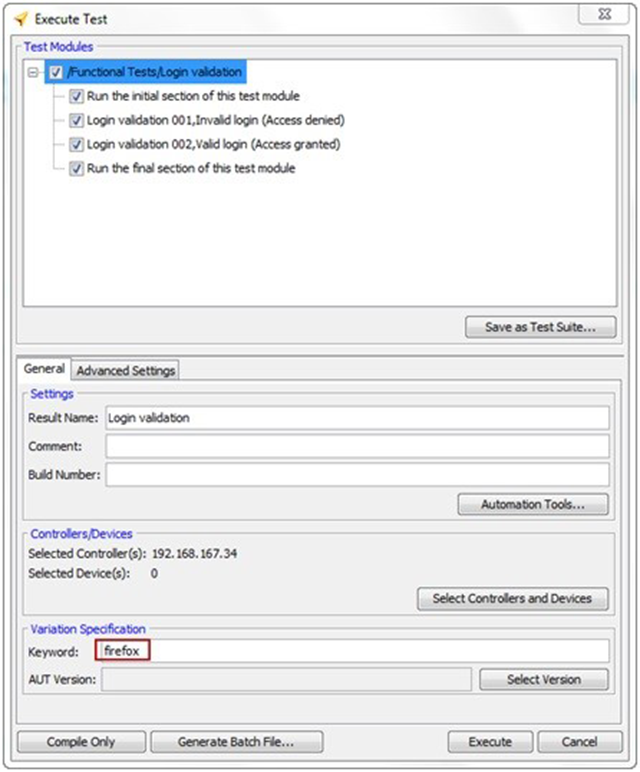
- Click Execute to start the test. (Figure 15)
3. Using Systems & Platforms
The Systems & Platforms feature makes creating cross-browser tests easier. Supported browsers are Internet Explorer, Mozilla Firefox, Google Chrome, and Edge. To do this, we follow these steps:
- Create a platform and version
- Link each variation to a version
- Execute a test with variations
3.1. Create a Platform
To execute your tests across multiple browser types, you must create a new platform and name it. For example, we’ll name ours “Browser.”
- Right-click the Systems & Platforms node, and then select New Systems or Platform. The New System dialog box appears.
- Enter details for the new platform:
- Name: The name of the new platform (“Browser”).
- Description: A short description of the platform (this is optional).
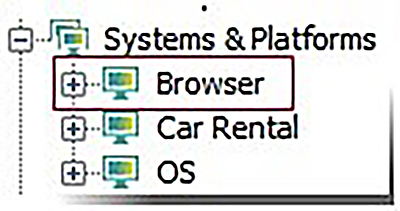
- Click Create.
- The Browser platform is added as a node beneath the Systems & Platforms node.
3.2. Create a Version
You can now create 3 version nodes for the Browser system and platform. The 3 new version nodes you will create are Internet Explorer, Mozilla Firefox, Google Chrome, and Edge.
- Right-click the Browser node beneath the Systems & Platforms node, and then select Add Version.
- Enter the details for the new version:
- Name: the name of the new version, (e.g., “Internet Explorer”).
- Description: a short description of the new version (this is optional).
- Click Create. The new version Internet Explorer is added as a node beneath the Browser system node.
- Repeat the above steps to create the other 3 versions, Chrome, Firefox, and Edge.
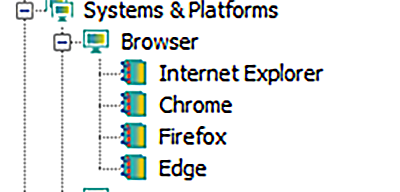
- The 4 new versions–Internet Explorer, Chrome, Firefox, and Edge–are added as nodes beneath the Browser platform node.
3.3. Link Each Variation to a Version
Select the high-level action or interface entity for which you want to create a variation. The set of variations of a given item is used to execute cross-platform Automation tests.
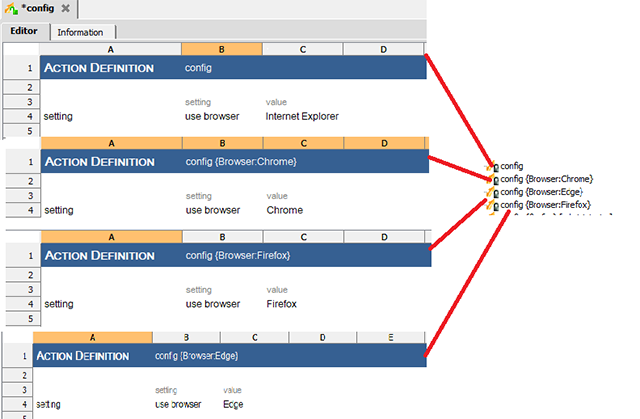
Example: You have a high-level action called config that is used to create essential initial configurations for the browser. It is suggested that you have variations of the config action that set up web Automation tests for each of Internet Explorer, Edge, Google Chrome, and Mozilla Firefox.
- In the TestArchitect explorer tree, navigate to the node for the config action you created earlier, right-click it, and then select Copy.
- Right-click the Actions node in the explorer tree, and select Paste with Variations. You have now created a variation for the config action.
- In the Variations dialog box, select the Link to version node checkbox.
- From the Select system drop-down list, select Browser.
- In the displayed system subtree under Browser, select Chrome to link this variation to Google Chrome.
- Click OK. Your new config variation for Google Chrome appears as a node in the TestArchitect explorer tree.
- Repeat the above steps to create another variation linked to Mozilla Firefox and Edge respectively.
Important: You now have 3 variations of the default config action, but their contents are all identical. Obviously, you must edit them (well, 2 of them), to get them to have different behaviors – that is, to ensure that each is tailored for its respective target browser. That editing is fairly simple:
3.4. Executing a Test with Variation
In TestArchitect explorer, select the test modules that you want to execute across multiple browsers.
- Click the Execute button on the toolbar. The Execute Test dialog box appears.
- Execute the test modules.
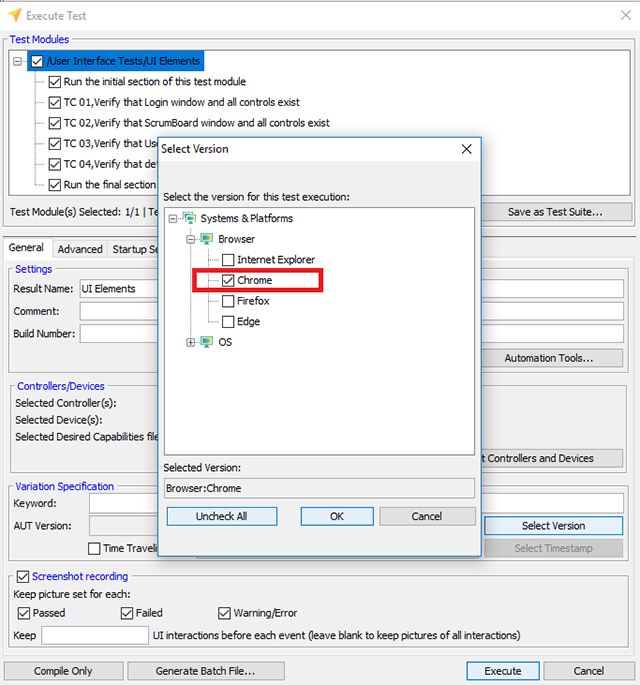
- In the Execute Test dialog box, click the Select Version button in the Variation Specification frame. The Select Version dialog box will appear.
- Select a browser.
- Select the Internet Explorer checkbox to execute against Internet Explorer.
- Select the Chrome checkbox to execute against Google Chrome.
- Select the Edge checkbox to execute against Edge.
- Select the Firefox checkbox to execute against Mozilla Firefox.
- Click OK.
- On the Execute Test dialog box, click Execute to start the test.
Conclusion
And there we have it: multiple ways for you to easily perform Cross-Browser Automated Testing! The fact of the matter is that consumers today have a plethora of options to choose from when it comes to web browsers, and you need to make sure that your product works on each and every one of them. There truly is no excuse to not do so—especially when Cross-Browser Automated Testing can be this easy using TestArchitect. If you’re still looking for more help with TestArchitect, head on over to www.testarchitect.com; we have tons of resources for you to use, including white papers, FAQs, and user stories just like this one. Happy testing!